

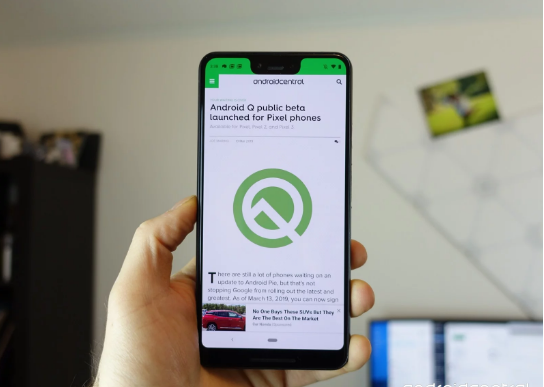
Despite everything we don’t have the idea what it’ll be called — what can it be called? —however Android Q is formally here, and its fifth beta is accessible at this point. The fifth Android Q beta is presently accessible, and we’re getting truly near a last, stable version, which is required to come later this summer. The fifth beta evens out a portion of the bugs, helps fix issues with the new gestures, and makes way for changes to how third-party launchers work with those gestures.
Which phones are receiving Android Q beta 5?
There are 8 phones from Google currently getting Android Q beta 5:
- Pixel 3 XL
- Pixel 3
- Pixel 3a
- Pixel 3a XL
- Pixel 2
- Pixel 2 XL
- Pixel
- Pixel XL
Is there an extended Android beta program for non-Google gadgets like there was with Android P?
Indeed! There are presently 20 phones from 12 different manufacturers, which is the most at any point seen from the beta program.
- ASUS ZenFone 5z
- OnePlus 6T
- Huawei Mate 20
- Xiaomi Mi 9
- Xiaomi Mi Mix 3 5G
- Nokia 8.1
- LG G8
- Essential Phone
- Sony Xperia XZ3
- OPPO Reno
- Tecno Spark 3 Pro
- Realme 3 Pro
- Vivo X27
- Vivo NEX S
- Vivo NEX A
The easy way — Android Beta Program
Basically visit the Android Beta portal and opt-in to the beta, which will at that point prompt Google to send your phone or tablet an over-the-air update. Depending on the planning, your phone will get the most recent beta and then an OTA for the final version, or it will simply get the last form of Android Q.
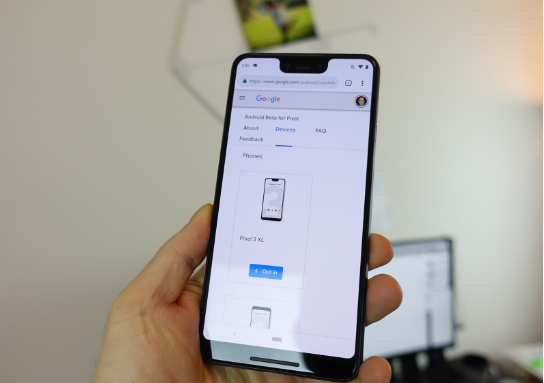
- Head to Android Beta program entrance on your Pixel telephone.
- Sign into the Google account related with that phone.
- Scroll down to Your eligible gadgets.
- Discover the gadget you want to enroll in the Beta program and tap Opt in.
- Follow the prompts on your phone to acknowledge the over-the-air download.
The harder way — Flashing through bootloader
Empower developer settings and USB debugging
- Go to your Settings and scroll down to About Phone/Tablet.
- Tap on the Build number 7 times until the dialog box says you are currently a developer.
- Go back to the Settings menu and you should locate a new option called Developer options. Tap into the Developer alternatives.
- Ensure that the developer options are turned on and that USB debugging is checked on.
- Plug your gadget into your computer and tap “OK” on the dialog box asking you to Allow USB debugging while associated to the computer. You can likewise select to consistently permit access on that computer.
If done accurately, this will be everything you will need to do on your phone or tablet for the moment.
Unlocking your bootloader
Pixel phones purchased from Google directly have a bootloader you can unlock. If you need to manually flash software, you’ll need to do this.
To do this you initially boot into your bootloader. You can either manually turn off your phone or tablet and hold down the power button and the volume down button to enter your gadget’s Bootloader Menu or you can enter the accompanying directions into your terminal or command prompt.
Run the accompanying order to ensure your gadget is appropriately associated with your PC. If itrestores a series of characters it implies that you are good to go to begin refreshing your gadget.
./adb devices
Now to enter into the Bootloader menu simply run the following command.
./adb reboot bootloader
At the base of the screen, there will be a few things listed including the lock state of the device. This should say locked except if you have unlocked your bootloader in the past and never returned and locked it again.
To open your bootloader, which is required just when flashing a stock firmware image (not side loading an update), you must enter the accompanying directions. Keep in mind that when unlocking your phone’s bootloader it will factory reset your gadget, so you will lose everything stored on it. If you have not yet backed up anything significant on your device you can hit the power button while Start is featured in the Bootloader menu and this will boot you once again into your gadget like ordinary. Presently back to opening your bootloader.
Now type:
./fastboot flashing unlock
A dialog will show up on the gadget inquiring as to whether you are certain about opening. Again this will factory reset your device, so if you want to retreat from the procedure you simply need to choose no with the power button. If you are prepared to open your your bootloader you press the volume up button and then the power button to affirm that you wish to unlock your bootloader.
./fastboot reboot-bootloader
It is prescribed to reboot the bootloader just to give itself a check to ensure everything is working effectively before proceeding onward to the subsequent stage.
Flashing the stock image or OTA update
Presently that your bootloader is unlocked, it’s a great opportunity to flash the new firmware. To discover the images, head on over to the Android Q Factory Images page, discover your gadget, and download the most recent image. It is easiest to then uncompress the file in the Platform Tools folder you downloaded (where the adb and fastboot files are)
so you don’t need to type the way to the various records when glimmering the firmware. (Or on the other hand on the off chance that you realize that you can drag a record into a terminal window to duplicate the way, simply do that.)
To start, ensure you are still in the bootloader menu on your gadget and twofold watch that your bootloader is in actuality opened.
To begin with, ensure that your PC is discussing effectively with your telephone or tablet. For whatever length of time that your gadget’s sequential number returns as an associated gadget you are prepared to start refreshing your gadget.
./fastboot devices
Once you’ve checked that the phone and the computer can communicate the way they need to, you can get to blazing.
Flashing a full Factory Image
Initially, you’ll need to flash the refreshed bootloader with the following command.
./fastboot flash bootloader [bootloader file].img
You won’t see anything on the screen of your gadget however there ought to be a discourse in your terminal or order brief. When it is finished blazing the bootloader you should reboot back into the bootloader to ensure everything is as yet working accurately.
./fastboot reboot-bootloader
Next, you streak the refreshed radios. This progression is just important if you are refreshing the firmware of a phone or tablet that has cellular radios built into it.
./fastboot flash radio [radio file].img
./fastboot reboot-bootloader
At last, it’s a great opportunity to streak the real framework picture to your telephone or tablet.
Warning:The following line of code will wipe your gadget. Ordinarily, you can evacuate the “- w” from the direction however when moving to a beta rendition of Android it’s not ensured to work.
./fastboot -w update [image file].zip
At the point when this is done, your phone will restart itself and boot up normally.ordinarily. As this procedure clears all information from your gadget, it will take marginally longer for your gadget to boot up just because. When you have been welcomed with the gadget arrangement walk through process, you realize you have effectively flashed another adaptation of the firmware.
If you would prefer not to enter the directions physically there are contents incorporated into the packed envelope containing the framework picture that will do most however not the majority of the hard work for you. The glimmer all content records will mechanize the blazing of the bootloader, radios (if necessary), and the framework picture. The issue with this procedure is that you should initially ensure that your phone is in the bootloader menu and its bootloader must be unlocked before beginning the content. Obviously, if these are not officially done the content will neglect to run and nothing will occur.
Going back to Pie
If your phone is is going ballistic or you simply need to return to Pie, it’s certainly conceivable. The procedure is straightforward, and you simply figured out how to do it! Just revisit similar strides above, with the exception of two changes: you don’t have to open your bootloader once more, and you’ll need to download the Pie processing plant picture from Google.
If you have any inconvenience along the way, make certain to jump into the discussions and request help!