

To be a decent photographer, it takes something beyond a decent camera. That being stated, technology is additionally imperative, and this also applies to cell phone photography. With the assistance of a couple of changes, a few applications and without extra learning, here’s the way you can get progressively out of your cell phone’s camera. We’ve recently included several new tips for taking better dusk or sunset and gathering photographs or party photographs, in addition to a specialist manual for bokeh impacts.

Jump to area
- Preparation
- Photographic innovation/technology
- Subject choice and structure
- Master the bokeh mode
- Use AI highlights
- The right central/focal length
Tips and traps for cell phone photo: setting up your cell phone
Best goals and picture quality
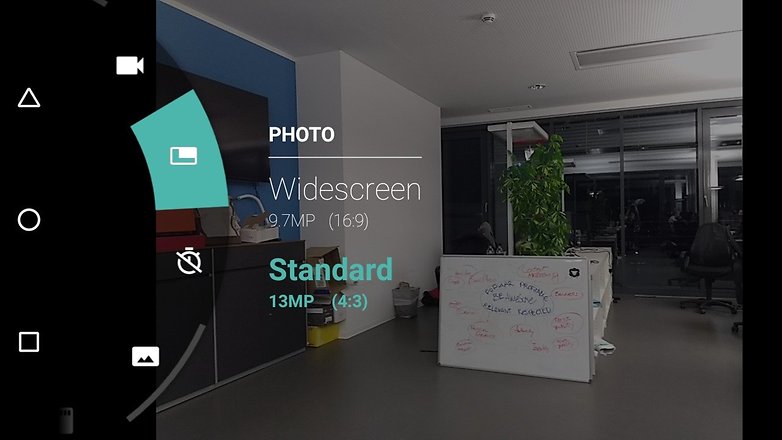
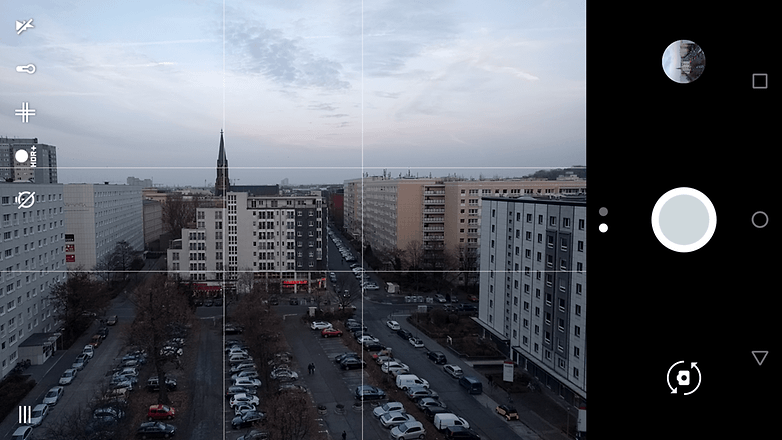
Before you begin with your cell phone camera, check the settings. Much of the time, the production line settings are not ideal. Now and again a lower goal is set. Frequently, this provides a superior advanced zoom – however, you should likewise pursue our recommendation beneath. It is also prudent to change the angle proportion with the goal that you get the biggest possible picture. The screen capture beneath demonstrates the 16:9 configurations, on the grounds that in the 4:3 organizations, pages are truncated. With different cell phones, it tends to be the careful inverse: the 4:3 arrangement makes the biggest photographs, however, the 16:9 pictures cut off the piece of the image. A short time later, you can choose the best picture detail.

Since top-quality pictures consume more memory space than those with low resolution, you should dependably have a microSD card – obviously, this is just if your cell phone has the relating card opening. In the event that this isn’t the situation, spare your old photographs and void the memory before taking more pictures.
Clean the focal point or lens
Ensure the camera focal point is free of dirt and fingerprints. The cell phone likely invests the majority of its time in your coat pocket or handbag, where dust can jump on the focal point or lens. It’s ideal to wipe a fabric over the focal point before snapping a picture. Utilize a commercially accessible microfiber fabric or a cleaning material from the optician to clean the focal point without scratching it. Facial tissues are likewise great if vital, yet they some of the time leave behind fine and irritating dust.
Tips and traps for cell phone photo: innovation and core interest
Finding the correct introduction settings
In photography, three qualities are important to the photograph: presentation time, opening, and ISO values. Together, they decide how splendidly the photograph is exposed, how forcefully the background is engaged, and whether an item in movement is blurred in the picture.
Gap or Aperture
For cell phone photographs, you, as a rule, can’t modify the gap, since it is fixed. Along these lines, it is essential for cell phone picture takers to locate the correct settings for the ISO values and introduction time. In the programmed mode, the camera decides these independently, however, the manual mode regularly gives better and increasingly exact outcomes.
Introduction or exposure time
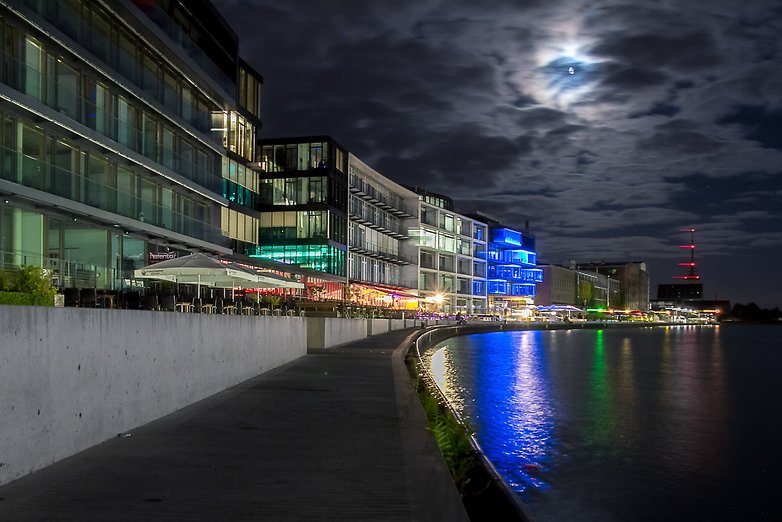
Long presentation times are a possibility for improving the enlightenment of your photograph, particularly in poor lighting conditions. Be that as it may, this makes moving items make streaks. This impact can be utilized artfully for waterways or in night perspectives on a city. Short presentation times, then again, really freeze a minute in time.
ISO values
The second esteem you need to understand to comprehend is the ISO esteem. This shows the light affectability of the sensor. The higher the esteem, the more sensitive. With a higher ISO esteem, you can, for instance, shorten the introduction time and accordingly give sharper pictures. In dim situations, you regularly need a high ISO esteem and a long presentation time.
So why not generally shoot with a high ISO esteem? The reason is straightforward: a high ISO esteem also makes more noise in the picture. Each cell phone acts a bit in an unexpected way: some cell phones have camera noise issues at ISO 400 or 800, while others have noise issues considerably sooner. Accordingly, you need to figure out how your cell phone camera handles this, and discover which ISO esteem leads to careful satisfactory outcomes. For most circumstances, values up to a limit of 200 are perfect.
Set the concentrate physically
For a successful picture, a great deal relies upon the correct core interest. The self-adjust or auto-focus is typically useful, yet it isn’t perfect. All things considered, it frequently does not realize what we truly need to have in focus. A touch of the finger is sufficient to stay away from this issue, in light of the fact that the touch center is the solution. Contact the screen where you need the camera to focus. In the manual method of the camera application, you can even focus the camera totally physically.
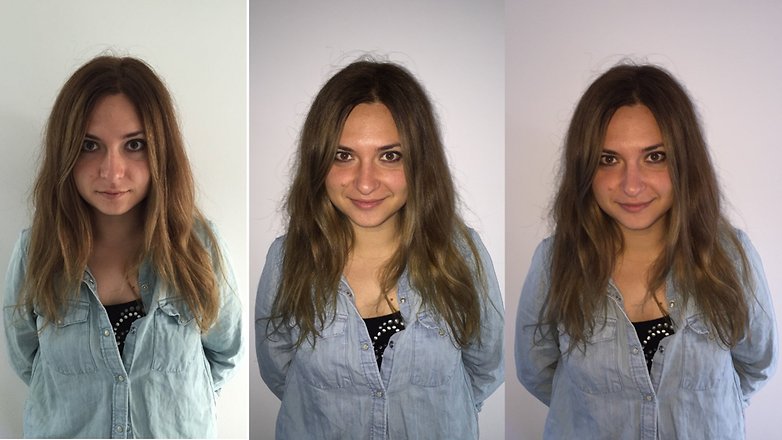
Take different shots, sort them out later
Rather than depending on the ideal snapshot, it’s better to take various snaps of your subject. On the off chance that the main photograph of your romantic kiss before the Eiffel Tower in Paris is out of focus, you will most likely think twice about it later. Simply snap each subject a few times and focus on the auto-focus. What’s more, do this enough occasions until you believe: that is certainly a decent picture. These days, awesome cell phones offer several picture work, which enables the camera to take a few photographs in the series with only one press of the button.
Two-gave use
Quick snapshots frequently spring up amidst the insufficiencies and elements existing apart from everything else, so they might be somewhat unsteady. Be that as it may, on the off chance that it is to be totally clear, easygoing one-gave photography is essentially insufficient. Keep your cell phone steady and stable with two hands. A tripod with a cell phone holder is perfect for the ideal stand, however, it is also frequently enough to help the cell phone on a railing and to balance out it that way.
Tips and traps for cell phone photos: subject and point of view
Standard of thirds
The standard of thirds is an improved usage of the brilliant proportion. The picture is subdivided by methods for two flat and two vertical rules so that these make nine uniform boxes. For some cell phones, you don’t need to imagine the network, since you, for the most part, have a capacity set up that fills in as a guide. The subject should then be put on one of the four intersection purposes of the framework, or additionally along a line, so it is legitimately set in the scene. In landscape shots, it is helpful to adjust the skyline on one of the two lines.
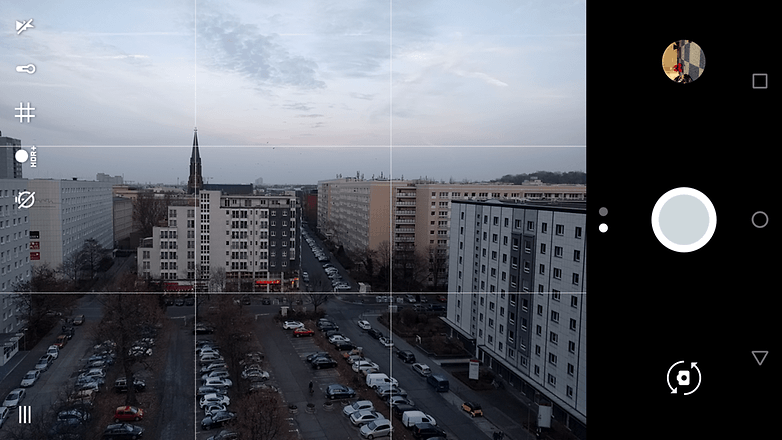
With the standard of thirds, an extraordinary photograph creation is a drop in the bucket. There are extra settings for the assistance lines. Some applications can show the assistance lines additionally in the brilliant proportion, which can result in a minor difference in the picture plan.
Straight skyline/ horizon
This tip is connected to the last one, and here you can also utilize the inserted framework in the viewfinder. Warped lines bring turmoil into a photograph, except if it is planned. The skyline is the dominant line when investigating into the distance, so guarantee that the skyline isn’t crooked.

A guideline of room/ rule of space
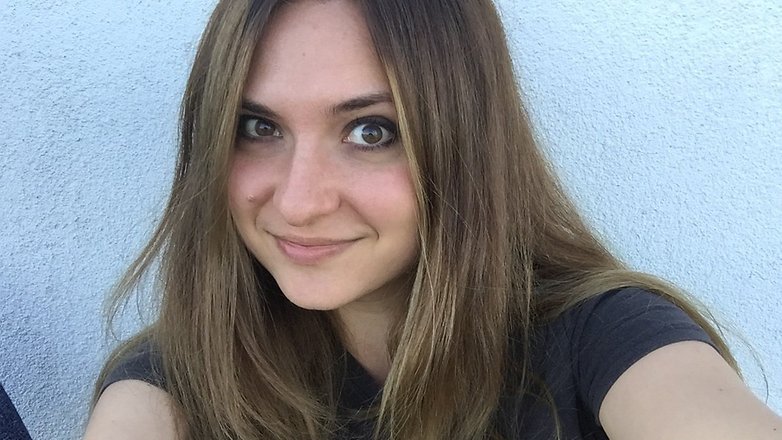
As of now referenced, a few subjects in the photograph additionally need space “to inhale or to look.” Like the brilliant proportion, another component can make more harmony in a photograph. Utilizing the standard of room accurately, it makes a feeling of development, movement, or fulfillment in the piece. With a picture, the look of the subject can wander into the separation, and usually perfect to leave space toward the eyes and to not cut off quickly at the face. For instance, the look can also express the way that the individual depicted is simply focusing – which frequently carries more life into the photograph.

Guarantee components in the closer view
Photographs delineate the three-dimensional space around us. In the event that your subject is very far away, in any case, it tends to be valuable to upgrade this with a few picture layers. An individual, a tree or another item in the frontal area revives a generally distinct display, since its essence loans the general picture more depth.
Photo from above
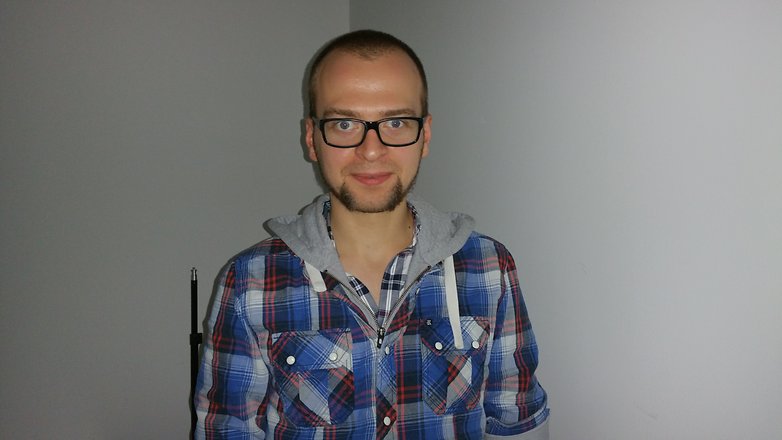
On the off chance that you need to take selfies or portrait photos of other individuals, you should keep the cell phone slightly higher when you take the photos, with the goal that the subject looks a bit upwards when you snap the picture. This avoids the irritating twofold jaw impact and undesirable shapes. Obviously, there are different positions where your best side goes to the fore. On the off chance that you look into, you extend your neck and face and everything turns out a bit smoother and firmer without picture handling and beauty mode. In any case, don’t run over the edge with the shooting from above, generally, the individual resembles a diminutive person.
Hang tight for the correct time of day
Previews frequently don’t take into account the advantage of the patient picture composition. Be that as it may, on the off chance that you are arranging a photograph, you should think about when you take it since morning and night hours frequently offer considerably more interesting light conditions than early afternoon.
Play with the point of view
A photograph does not generally need to be straight on; we as of now have that point of view throughout the day. Attempt an alternate edge, put yourself on a slope and photo descending, or go down on your knees for a shot. This frequently makes all the more fascinating pictures – aside from the hated twofold jaw. So be cautious with shots from beneath.

Scene
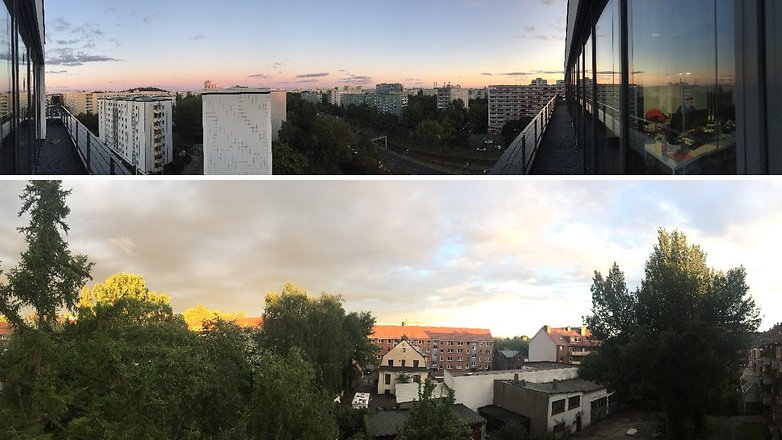
On the off chance that you would prefer not to photo individuals, however nature and scenes instead, the display mode is offered. Most importantly, extremely expansive subjects, for example, a mountain chain or sunset at sea, here and there need more space than is accessible on a single photograph. Essentially every current cell phone has a comparing mode that deals with snapping and gathering various pictures and neatly joining them for you. In the event that your cell phone is somewhat more established, an application from Google Play with the best possible capacity can also be useful. Scene pictures are additionally reasonable for a spread picture on Facebook, regardless of whether the entire picture can’t fit in the edge; the most alluring piece of your profile can be stressed much more.
Watch the lighting
Light can be your companion and your enemy, depending upon your condition and what you need to catch. Frontal exposure to the sun is regularly a genuine issue, except if you deliberately overexpose the picture and play with the complexity in post-preparing. In the event that conceivable, remain with your back to the light and keep away from solid shadows from the front. On the off chance that the frontal light source is some of the time unavoidable, include the glimmer, which some of the time makes a difference.
Utilize the flash just in a crisis
On the off chance that a solid introduction isn’t significant for the picture, one should shun utilizing the blaze, since it only sometimes creates extremely delightful pictures. Not exclusively does the nature of the hues endure, the uniform brightening frequently totally decimates the picture. The closer view sparkles splendid white, while the foundation totally vanishes. At last, a photograph with normal light and more picture commotion are regularly more lovely and attractive than one hit by lightning.
LED streak
The LED blaze of the cell phone camera is to provide your previews with the proper presentation if the suitable light is absent. Yet, the outcome with cell phones is generally disappointing and the subject appears to be unnaturally overexposed. The foundation also experiences the brilliant light of the blaze, which conveys the subject to the frontal area, however, throws shadows on the rest of the subtleties. A photograph streak regularly prompts hard shadows, which robs the picture of its instinctive nature. As a countermeasure, you can utilize a semi-translucent white tape that sticks over the blaze of your cell phone.
That gives you a custom made diffuser that slightly diminishes the hardness of the lightning and accommodates smooth light and shadow advances. This makes the photograph progressively regular and lovely. Particularly at gatherings with a little subdued lighting, the handcrafted diffuser can do some amazing things.
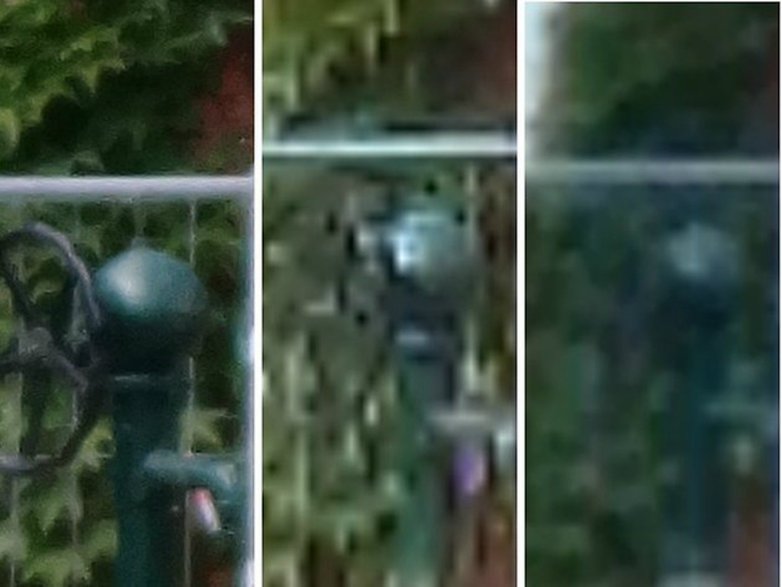
Zoom in with your feet
The advanced zoom on the cell phone may spare you a couple of steps, yet it ruins the image. This is as yet a major shortage of cell phone cameras contrasted against partners and optical zoom, just as smaller and SLR cameras. Since the long-range focal point is feeling the loss of, the picture area is simply carefully developed, which definitely decreases the detail goals. So help yourself out and get a couple of steps nearer.

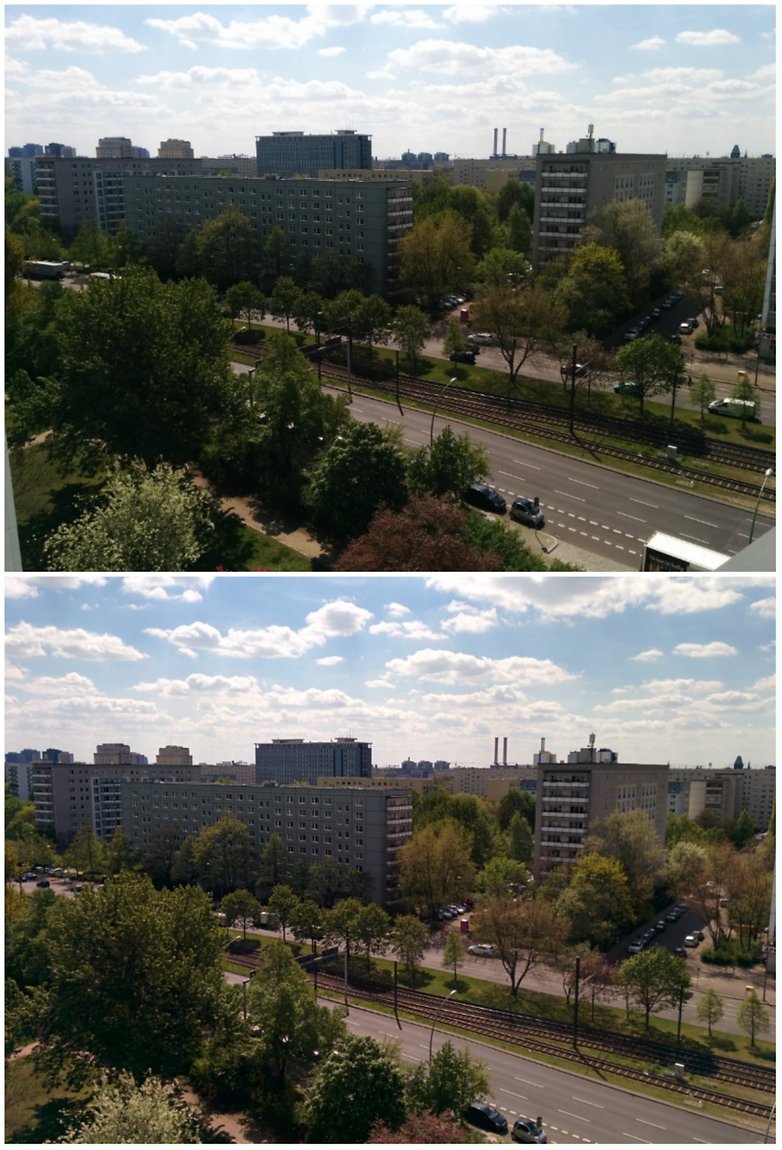
Love shadows as much as the sun
The HDR mode is progressively utilized in cell phones to make up for solid light disparities in the image. To begin with, it has its breaking points, and second, it regularly shouldn’t be utilized on the off chance that you just placed yourself in the shade and photo outside of it. Direct light can influence the picture greatly, so brilliant daylight does not generally guarantee brilliant pictures.

Successful post-preparing
Presently we leave the field of photography. When the photos are taken, there’s the following stage: sharing them. Before you do this, be that as it may, you can at present improve the photographs – be it to address the colors, to pick the correct cut, or to include more dramatization with filters. For this, you ought to introduce the proper picture altering application:
Pick the privilege application for you
The default camera application from your cell phone is presumably good yet it probably won’t have every one of the highlights you like best for your shooting style. It merits investigating the alternatives out there, both in paid applications for all the superior additional items, and even great free ones like Google’s camera application or Open Camera.
Take dusk photographs/ take sunset photos
Nightfall’s look incredible face to face, however frequently when you endeavor to catch the minute with a cell phone, the outcomes are disappointing. Cell phones have little picture sensors with a low unique range, which implies they can’t catch both the light and dull territories of the picture well in the meantime. That leaves photographs both underexposed and overexposed. This issue can be vanquished if your camera has an HDR mode.

HDR represents High Dynamic Range, and it takes a few shots with various exposures immediately, consolidating them all together for an all-encompassing powerful range. This outcome in the ideal impact of precise lighting, shading and more subtleties. The nightfall will look as it should, as opposed to at the same time under and overexposed.
Take extraordinary gathering photographs
At gatherings, the earth is frequently very dim and the subjects of your photograph will probably be moving around a great deal. To stay away from poor outcomes, there are a couple of things you can do. In bars and faintly lit rooms, you’ll be very much served by utilizing the flash. Attempt to take photographs where the foundation is lit so the photographs don’t turn out exhausting and dull.

Since individuals will have a great time and moving around, the best activity is taking numerous shots so somewhere around one won’t be destroyed by haze.
Get to grasps with your bokeh mode with these tips
Bokeh is wherever nowadays. Pretty much every top cell phone has an integrated bokeh mode in its camera application right now and Apple is pulling out all the stops on the component with its 2018 iPhones. Bokeh is an impact that puts your essential item in sharp focus while obscuring the foundation to make it a lot gentler than your subject. It basically mirrors the picture impacts of an SLR camera, and when you hit the nail on the head, the outcomes can be amazing. Here’s the manner by which to do it right.


- Find the bokeh mode in your camera application and enact it. On certain devices, it’s a little round symbol.
- Get the separation directly between your subject and item by moving the camera.
- Set your favored dimension of the gap. This will decide how obscured your experience is contrasted with the subject.
- Be cautious about glasses or windows, which can disturb the impact.
- Try to shoot before a printed foundation, a plain white divider will look the equivalent obscured or sharp.
- Shoot! On the new iPhones, you can even change the profundity of the field after you have made a go – really cool!
Artificial intelligence capacities and their entanglements
Increasingly more cell phones are joining purported AI works that are expected to support photographers. With procedures from the field of AI, cell phones perceive what is before the focal point and naturally modify various parameters. As opposed to the typical programmed mode, these incorporate not just white balance, presentation time, ISO and other essential choices, however frequently additionally impacts, for example, a bokeh determined into the picture, recreated studio light, the blend of a few shots into one and comparative things.

Particularly beginner in photography will profit by this, yet in addition, the individuals who would prefer not to experiment with and think a great deal, yet simply need to continue ahead with it rapidly. Frequently the AI support gives a cell phone photograph the completing contacts. In troublesome conditions, for example, low light, the AI can give imperative help.

But there are additional circumstances and intentions in which these AI partners mean it excessively well. Over and over pictures are made in which particularly the colors appear to be amazingly turned up. Also, excellence and representation impacts can truly misshape a photograph. It’s not in every case best to keep all settings automatic, particularly as there is no such thing as the “perfect” photograph: Every photographic artist finds an alternate look all the more engaging and only one out of every odd picture ought to accomplish a similar impact. The programmed framework along these lines likewise confines the innovative conceivable outcomes.
Also Read: Home Cameras Convey Facial Recognition to Your Front Entryway
Choosing the right central length/ focal length
Numerous cutting edge cell phones have two, three, once in a while even four different cameras on the back. When in doubt, they have diverse focal lengths, for example, an ultra-wide edge or a zooming focal point. So you can get extremely creative!
The diverse focal lengths convey cell phones nearer to genuine cameras in their possible outcomes since they spare you the computerized zoom. Particularly wide-edge focal points are helpful for catching a lot of scenes. The slight distortions are limited on the off chance that you keep the skyline in the focal point of the picture. With applications like SKWRT, you can likewise effectively fix the point of view.

Coincidentally, an ultra-wide edge focal point cannot exclusively be utilized for scene shots and the far range. With the Mate 20 Pro from Huawei, for instance, this focal point can also be utilized for large scale photography from short separations. To wrap things up, you can likewise take indoor photographs in rooms with which you can get considerably more on their picture.
With a zooming focal point with zoom – cell phones can at present zoom up to around multiple times, yet manufacturer more often than not abandon it at double the central length – you can bring things closer. That is absolutely helpful when you can’t draw near. Yet, fax is additionally useful for representation photographs, particularly as it upgrades the bokeh impact, for example, the profundity of the field. Yet, at that point, you should design enough distance to the individual.


In any case, be cautious: Usually, the focal points are unique yet, in addition, the sensors. It can along these lines happen that difference in presentation or white balance happen when utilizing the wide-point or zooming focal point, for instance. In this way, subsequent to changing to another camera, it is ideal to check directly in the case of everything looks the manner in which you need it to. Some cell phones, for example, the LG V40 ThinQ, even offer you the alternative of taking photographs with all cameras in the meantime with only a single click. At that point, you can choose later which one you like best.
The benefit you have in any way photograph taking tips you could impart to us? Did our tips help you? Tell us in the remarks underneath?